Labels

Wednesday 18 December 2013

Bellabox December 2013 . . . . to subscribe or not to subscribe?


So, this was the month that was going to decide whether I was going to stick with Bellabox (a beautybox subscription that you pay $15 a month for and get sent 6+ sample / full size products).

It has sucked me in again. This box is interesting to me and seems to be more tailored to my preferences that I put in when I first subscribed.

It came as usual in a small Australia Post box. Inside was black tissue paper surrounding a small, folded calico tote bag, which was in turn wrapped around the products.

This little postcard tells you about the items, their full size RRP and where you can purchase.

The first item is a handwash. Apparently it is all natural and it smells delicious. The fragrance is watermelon and dragonfruit. YUMMMMM. You can pick it up from Coles and I think the sample was a full size.


Second, there was a Romy Eucalyptus and Lemongrass body lotion. It feels and smells nice. I applied it about 10 minutes ago and the majority of the scent is gone from my skin which is sad as it was deliciously zingy when applied. 

Third there was an ASAP clearing gel which treats acne. I have the occasional spot so will be keen to give this a go. It's an Australian made and owned product also, so that is a bonus. The sample size is 15 mls also, so large enough to give you an idea of how it reacts with your skin.

The fourth item was an Avene Antirougeurs Fort Relief Concentrate. It is supposed to prevent and sooth red skin. So I guess it would be handy for those area like around your nose and chin. I don't really have a huge issue with that, but hey . . .  The sample is teeny, tiny though. 5ml.


Fifth was a Mary Kay Natural Cheek Tint. When I think of a cheek tint I think of a liquid or cream product. I opened up the little pot and it is a powder. Hmmmm. It's in the colour Copper which is quite dark. The instructions say to apply with fingertips. Interesting. I swiped it on my hand and it is quite pigmented with some very fine shimmer. Might be nice when I am a little tanned.


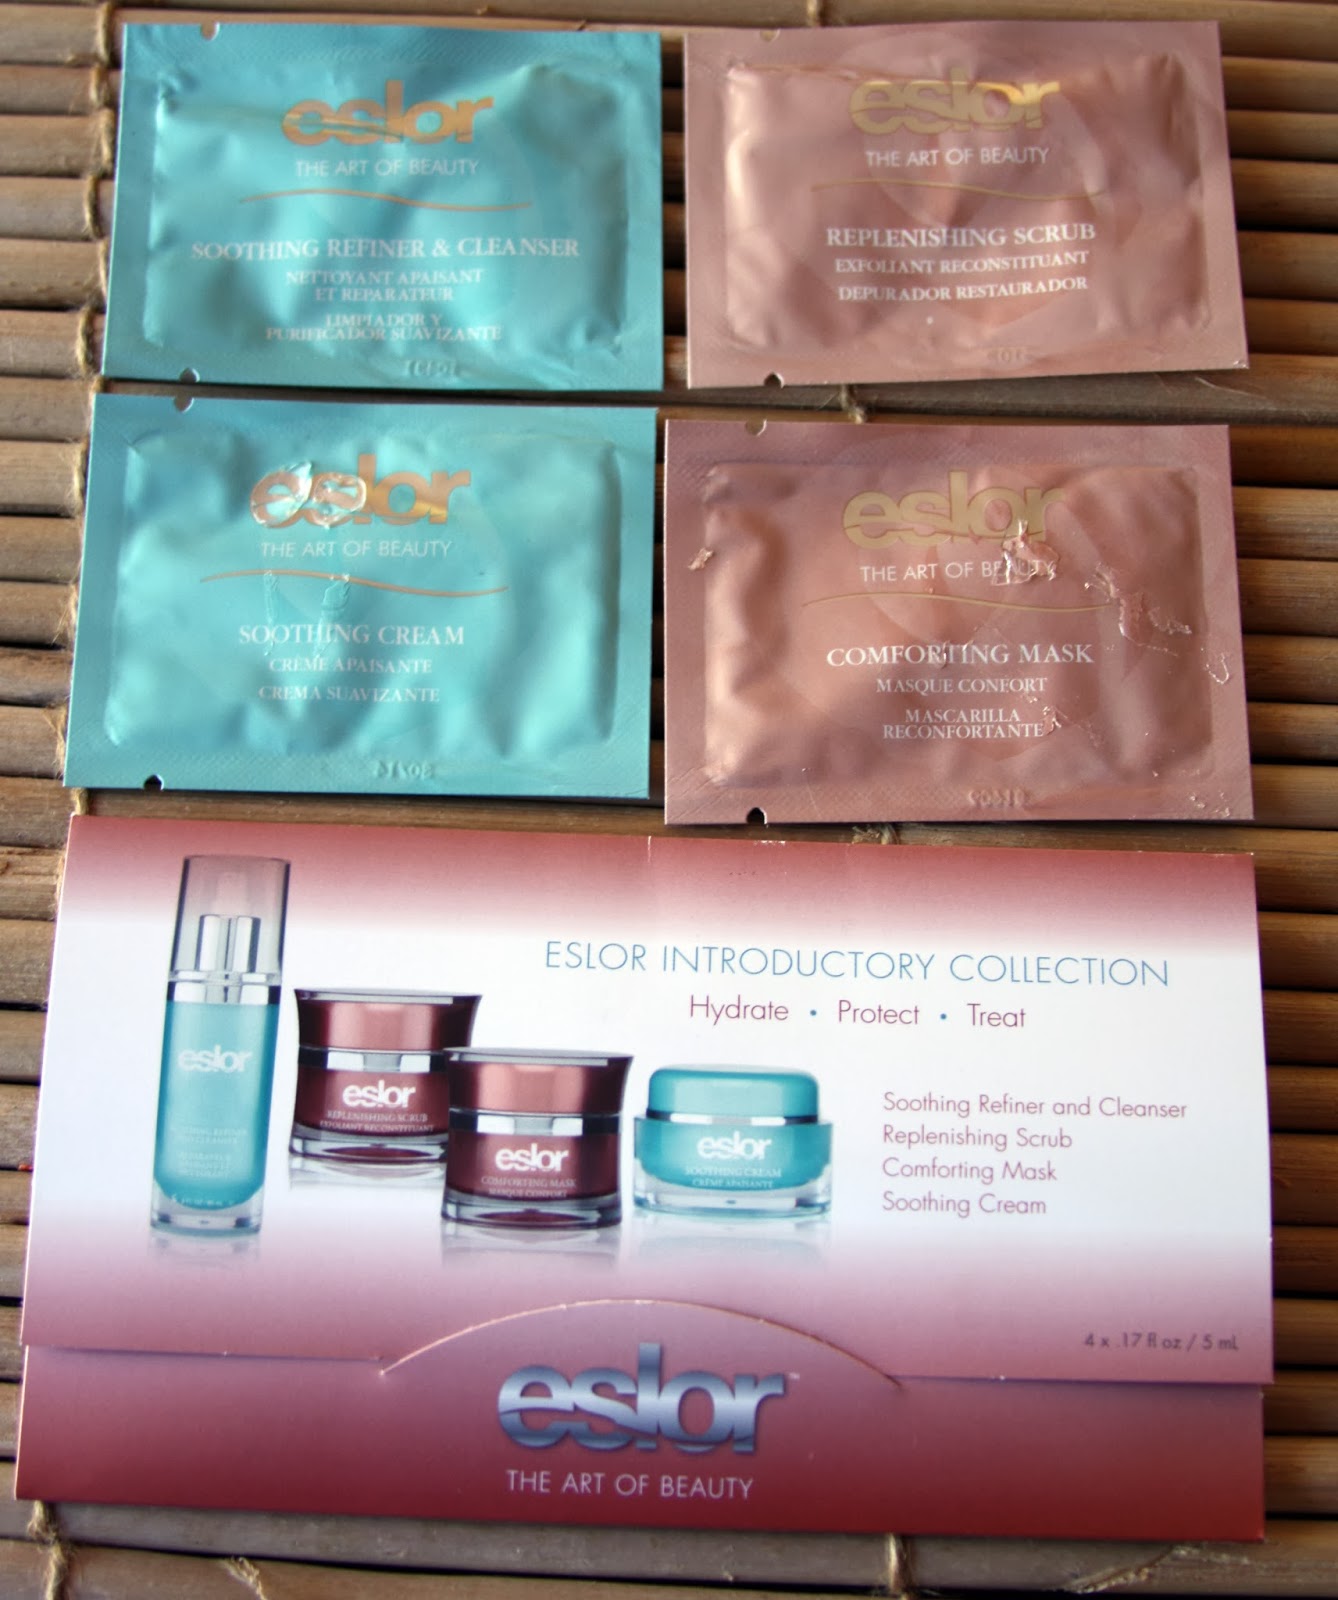
6th, there was an Eslor face product sample pack. I have never heard of the brand but was impressed that the samples came in a little envelope with a range of products so that you can try them out together. Very handy for a pampering evening.


There was a bonus of a teensy Mor handcream in Neroli Clementine. I love MOR products, so was happy to receive this.


The last 'bonus' that Bellabox has been mentioning in emails lately was the calico bag with chevron kind of stripes and a small Bellabox logo at the bottom. The info card says that this bag's RRP is $19.95. CRAZY. It's a little sheer calico bag that probably cost $2. It seems a little cheap for their branding to try and charge $19.95 for it.


So, all in all, I am quite happy with this months box, will see what next month brings, I am a fickle subscriber after all!


Sunday 15 December 2013

[Cook it] Rolo white chocolate mini cheesecakes


 These little suckers were inspired by a tube of mini Rolo's. Who even knew they existed? I love anything in miniature and decided that something of note needed to me made.

My first thought was a Rolo brownie, but then cheesecake won out.


These babies are delicious and great for a party or when you need to feed a few people as they are individual serves that do not require cutting. So if someone decides to be polite and eat theirs with a fork, that is fine, but there is no judgement for those who peel the wrapper back and take a big bite as well. You could opt to make them a little more 'elegant' and take them out of their wrappers if you wished as they hold their shape.

ENJOY!

Rolo White Chocolate Mini Cheesecakes

Makes 24

(loosely adapted from this Exclusively Food recipe)

Base
250gm Oreos (or other chocolate biscuit)
90gm butter

Innards
500gm Philadelphia cream cheese, at room temp
110gm sugar
1 teaspoon vanilla extract
4 eggs
290 gm sour cream
200gm white chocolate
200gm Mini Rolo's or other small chocolate of your choice

1. Whiz oreos in a food processor until smooth. Add butter and mix.


2. Divide heaped teaspoons of mixture evenly amongst 24 muffin cases. Press down with a teaspoon and smooth.

1. Empty cases. 2. Heaped teaspoon of oreo mix. 3. Press down mix and smooth with teaspoon.

3. It's very important that the cream cheese is at room temperature before it is beaten, otherwise the lumps with never, ever go away. So if you are unprepared, like me, cube your cheese, place in a microwave safe bowl and zap for 30 second intervals (at medium temperature) until room temperature i.e. not hot / not cold.

4. Place cream cheese and sugar in Kitchen Aid bowl with whisk attachment (you can use hand mixer as well) and mix at a medium speed until smooth. You will need to scrape down sides of bowl once or twice.

5. Add one egg at at time to mix, I find this easier if I crack them all into the one bowl.

6. Melt chocolate in a microwave safe bowl in 30 second bursts. Mix once it starts to melt and then continue on with 10 second bursts until completely melted. Add in sour cream and mix together until smooth and slightly shiny. Try and do this in a larger bowl than I did, it will be a lot easier.

That moment of regret when you realise your bowl is too small but refuse to change to a bigger bowl as that is extra washing up.
7. Add chocolate/sour cream mix to cream cheese, add vanilla and mix until smooth.
That chocolate, sour cream ganache like product was DELISH. Lick the bowl for that one!


8. At this point I divided the cheesecake mix into two containers as I was cooking the cheesecakes in 2 batches as I only have one muffin tin. It's also a good way to evenly distribute the filling, if you are a Virgo and a bit OCD about that kind of stuff . . .

9. Place a cube of chocolate or Rolo on biscuit base (I used some caramel chocolate as I realised I was going to run out of Rolo's).


10. Cover with the cheesecake filling and distribute evenly in the cases. Drop a few mini rolo's on top of each cheesecake. The cheesecake mix is dense enough so that they don't sink too far.


11. Cook at 180 degrees Celsius (160 degrees Celsius fan forced) for around 20 mins. You may want to turn at 10 mins to make sure that they all cook evenly. They should jiggle a teensy bit when you take them out of the oven.

12. Place on a tray to cool and then place in fridge.

13. Decorate the tops however you wish, I grated some chocolate.

These keep in the fridge for  a few days so are good to make in advance.


Add caption


Sunday 1 December 2013

[CAKE] DIY Pirate ship cake with gumpaste figures . . . . .


I love making kids birthday cakes. There's never too much colour or decoration and you can really go overboard in a way that isn't really embraced with adult cakes (although it should!).

I am lucky to have two nephews who are still young enough to love a decorated cake and usually give me an idea of what they want a month or so before their birthdays.

This year it was Mr. Eights birthday and he requested a pirate cake. He has had a pirate cake before but it was more of a skull and crossbones theme. This time I decided to go with a pirate ship as I haven't attempted many shaped cakes. There are heaps of pirate ship cake images on the web but not too many that show step by step how to make them.

I used these sources as inspiration (number 1 and number 2)for the cake and this blog as a guideline for the gum paste figures . . . . . . although mine were a lot less refined!

The gum paste figures were made a week before the cake was needed to give them enough time to dry out.That same weekend I also made the cakes for the base and froze them as I didn't have time to do it leading up to the party. I made them in loaf pans and I multiplied the recipe by 3 and it made 6 loaf cakes.


Hanging out with my petrified cane toad to dry.


The night before the party, I got the cakes out of the freezer to defrost and made five (FIIIIVVVEEEEE) servings of butter cream from this recipe.

I stacked the cakes into a rough rectangle shape around the size I wanted the ship to be. I then roughly shaped the sides and edges. I took the layers apart, once they were shaped, and started to stack them back together, using the butter cream as glue.

At this stage I thought I would never get rid of the crumbs!

Do you ever feel like you are being watched . . . . Stella was trying to find a chance to eat some cake.

Chilling in the fridge


Once they were stacked, I placed a kebab stick in the tallest level of cake as a stabiliser and placed in the fridge to firm up. Once firm, I removed from fridge and finished shaping. Once that was complete, I covered very roughly with butter cream. Once covered I placed in the fridge for 20 minutes to firm up then took out and smoothed and added more butter cream to the gaps.

Back into the fridge, set, then out again and smoothed with a warm palette knife (place a palette knife in a glass of hot water for 10 seconds, take out, dry, smooth butter cream!).

I then left this in the fridge overnight to harden.

In the morning I rolled out the chocolate fondant for the bottom of the boat. I attached it in 3 segments as I am not an expert with fondant and covering it in one piece was just too intimidating, The sides each had a piece, as did the back. The deck was half brown fondant and half white gum paste that I rolled into snakes and then twisted together then rolled out to give a bit of a variegated wood effect.

Once all the fondant was on, I marked the wood panels with a butter knife and a piping tip for the indents.

Then on with the flags and the gum paste figures.

I was really happy with the cake (as was the birthday boy)!


Friday 22 November 2013

[Beauty] Bellabox November 2013. . . . hmmmmmm, a review


I love a sample beauty box. I wish that the wonder of Birchbox was in Australia, but alas it is not.

Last month I subscribed to the Australian version, Bellabox, and today received my second box of goodies.

All items from the box


The excitement level was high as I received the Australia Post notification that it was on it's way as one of my favourite UK beauty bloggers / Youtube gurus, Tanya Burr,  did a post yesterday featuring the Australian beauty box.

It was chock full of items (8 I believe), which made my heart skip a little as I thought perhaps November was going to be a bumper month of goodies.

Size comparison with iphone on the right.


Alas, the box I received was full of 5.25 samples (6 if you want to get all technical, but the bump eraser sample is so small I am only counting it was a 0.25. . . hehe).

The actual box was a sturdy post box in a lovely turquoise colour, inside holding the yellow chevron kind of envelope (the Simple product was loose in the box as it was too big for the envelope).


Inside the envelope was 


1. Simple Eye Makeup Corrector Pen -  This should be helpful if I slip whilst applying liquid eyeliner (which happens more often than not). Not a super exciting addition to the box though as this brand is readily available through Priceline.


2. Bellabox Pb.livout Pencil in Nude - hmmmm, not really my kettle of fish. I am fair skinned and this comes off as a more tawny, orangey / browny nude. A little too dark to be a nude for me. Plus I am used to these style of sticks being more of a stain, so is unusual to see one in a lipstick formula.


3. Lapurete Okuru Protective Day Crème - I am excited about this product. It's a brand that I am not familiar with and I love a day cream with an SPF. Will definitely get some use out of this. The sample size is quite generous too.


4. b.liv by Cellnique Shrink and Tighten - this is quite a small sample considering the directions say to use 3 pea sized drops per daily application. Maybe it only has 3-4 uses in it. But, hey, who doesn't want smaller pores.


5. Aveeno Daily Body Moisturiser - Meh. Again. You can buy this brand at any supermarket / department store / Priceline, so wasn't all that enthused. It will come in handy to chuck in my handbag though.


6. Carbon Laboratories Bump Eraser Medi Paste - this was a 'bonus' item. I don't have the issues it treats, so . .. .  .


All in all I am not all that excited about this months box, the only thing that wowed me was the Lapurete Day Crème which I am excited to use.  I still think it's a bit sneaky of them to send a beauty blogger a box with 8 items though, when the whole purpose is for a blogger to blog about them, and is therefore not blogging a typical example of a box. Not too cool at all.

I will give Bellabox a few more months to see whether I think it is worth it, time will tell!